 How to build your own Tube Raft How to build your own Tube RaftFor
some time I have been wondering on how to build my own raft that is
cheap and that can fit in a small car for easy transportation.
Researching on the Internet suggested using Styrofoam and plywood which
worked out to be little expensive. My target was to make the raft
cheap... less than Rs. 1500/- ($30). Then the thought of my
kiddie-old-days struck me of using truck tubes while going swimming. And
this
small idea became the beginning of my great rafting adventures.
Items required in building a raft:
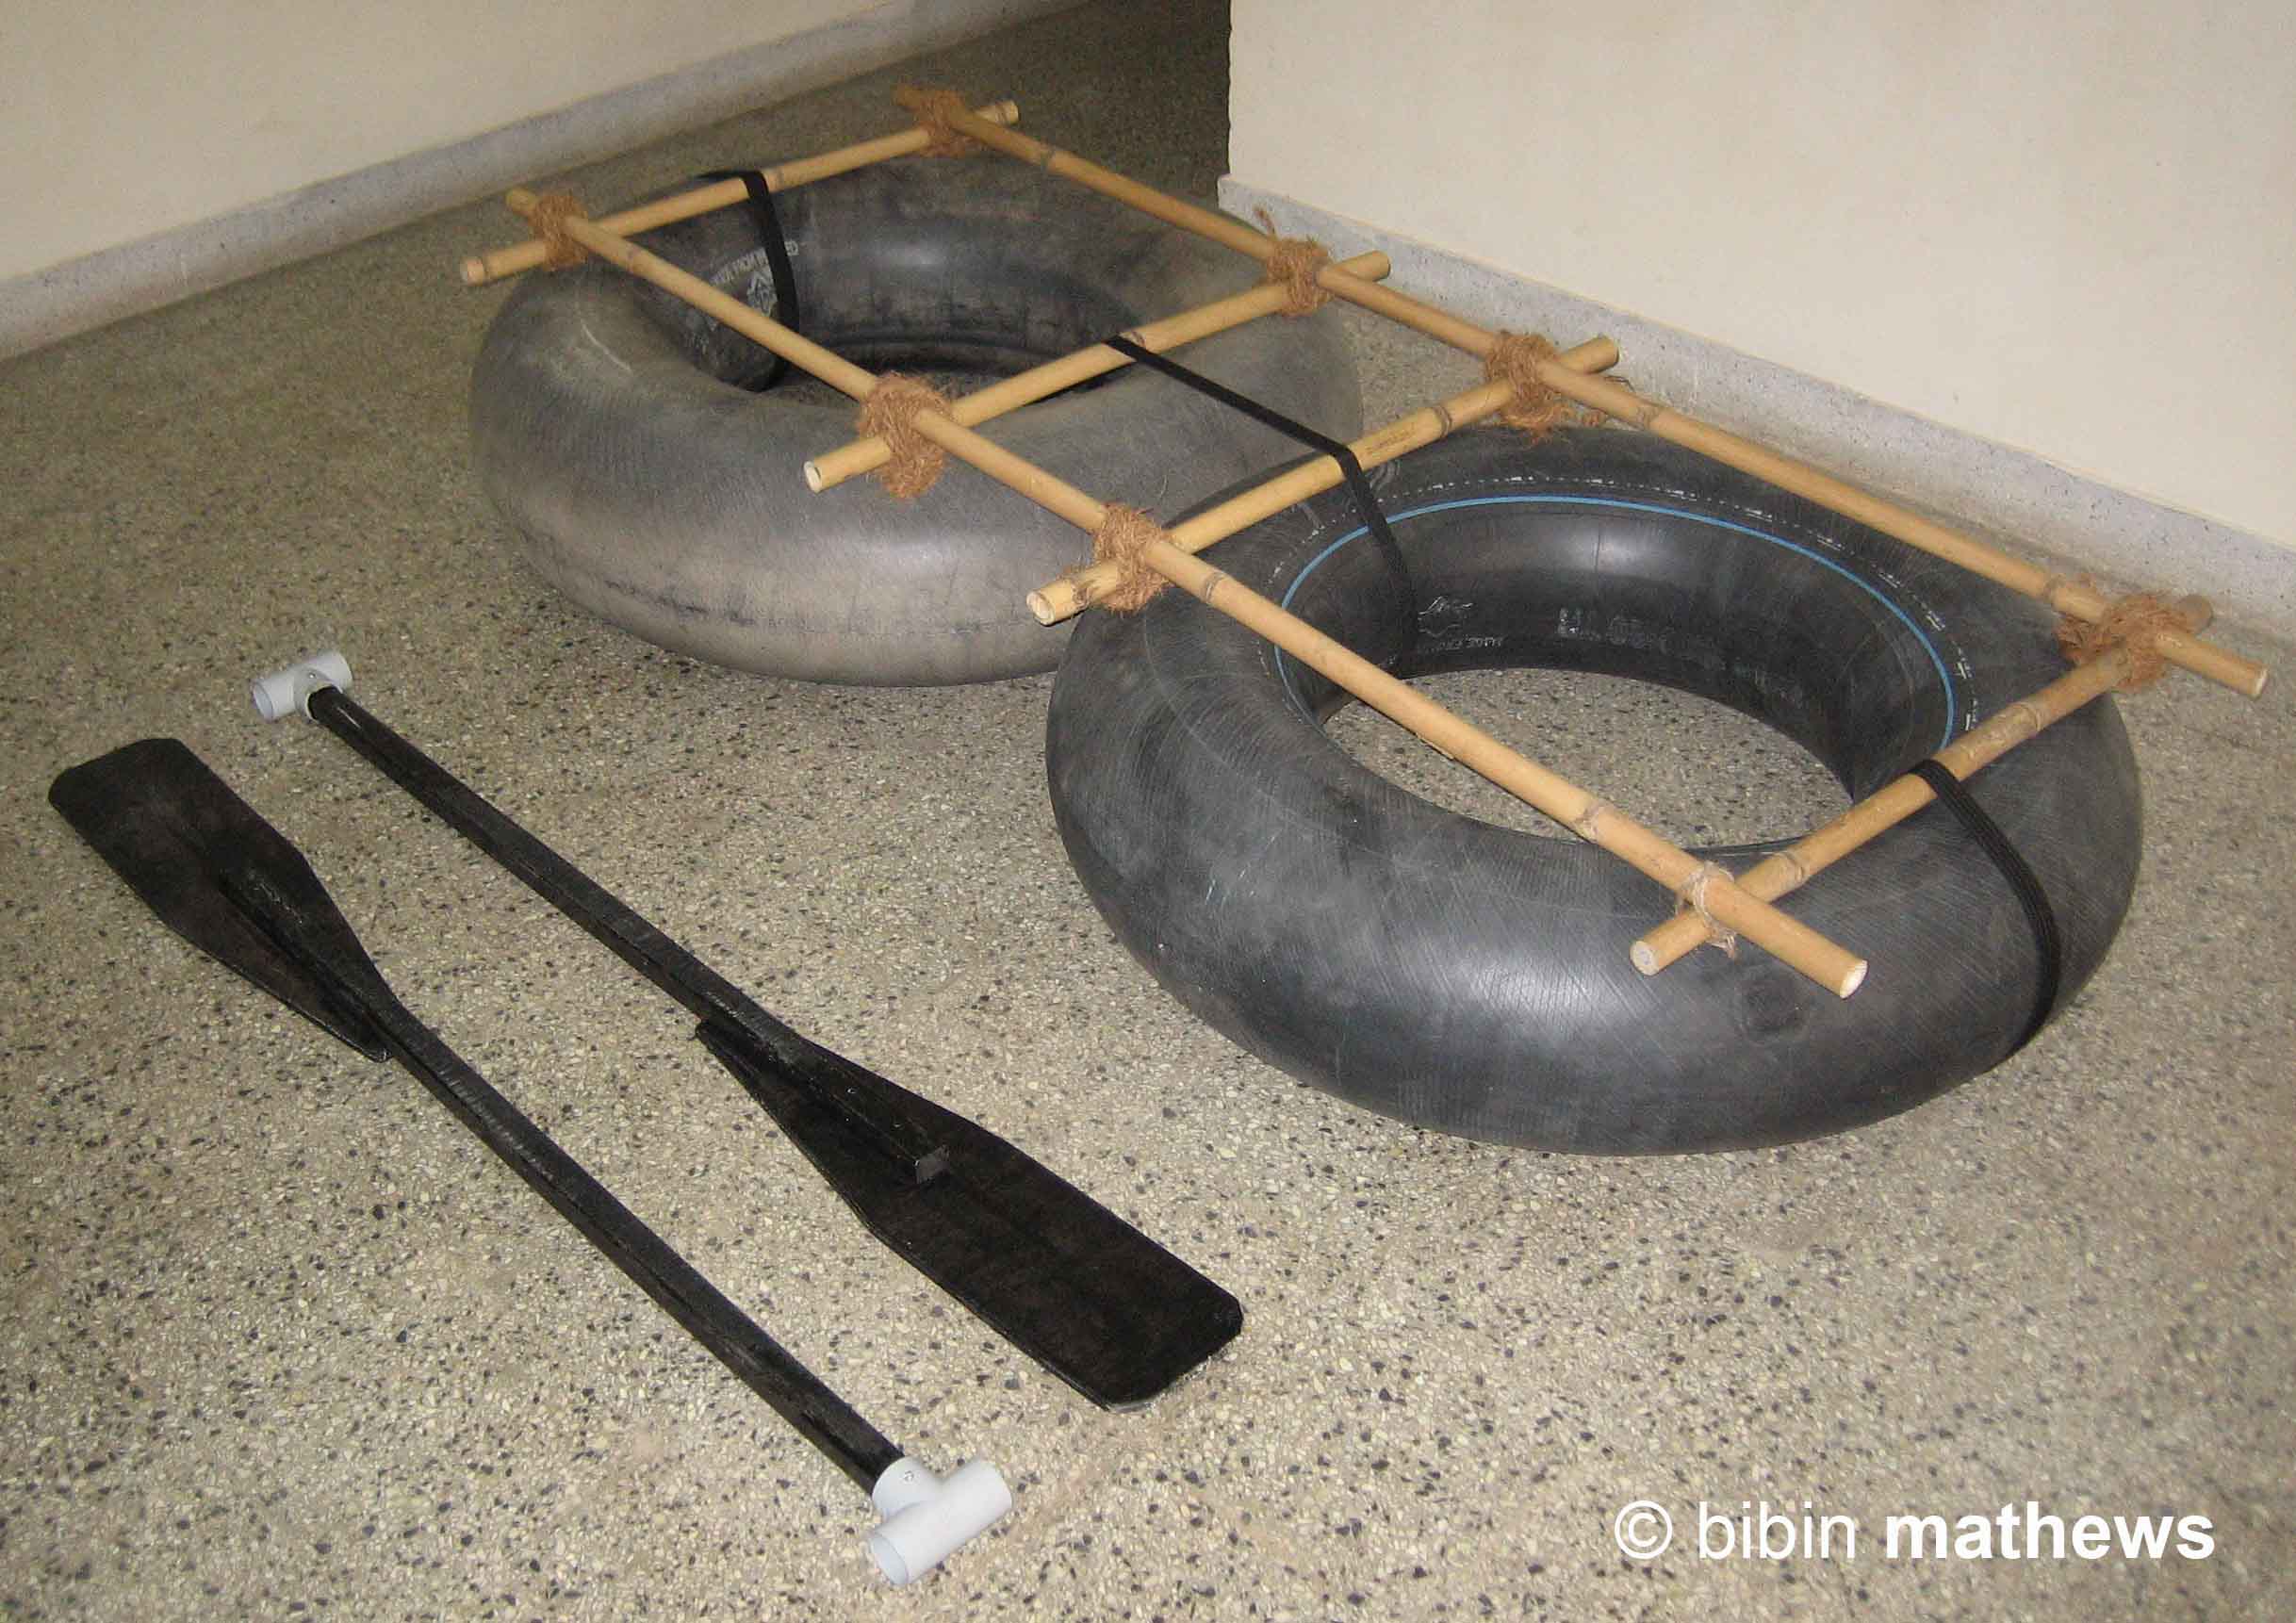
1. 2 (used) truck tubes=2
2. A foot pump for inflating the tubes (including a small tool to screw/unscrew air valves of the tube) 3. Bamboos all of (1.5 inches diameter): Length-6.5 feet= 2 pieces Length-3 feet= 4 pieces 4. Cheap coir/fibber ropes= 8 pieces of aprox. length of 4 feet 5. Nylon tape (used in back packs) and buckles. Tape width of 1 inch and length 4.5 feet each= 7 pieces 6. Homemade paddles= 2 pieces Here's
what the raft may look like
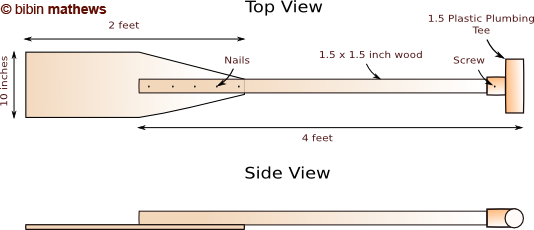
 Making the paddle:
I
made a very simple paddle as per the design below:
Just
take a cheap wood of dimension 1.5 inch x 1.5 inch and 4 feet in
length. Cut scrap plywood in the dimension shown below and nail one
end of the wood to the plywood and attach a plumbing 'Tee' to the other
end. It will be a good idea to drill one screw through the 'Tee' to
attach
it firmly to the wood.
 Remember, repeat the above for every
extra paddle you need to make. Finally, give the paddles a coat
of (enamel) paint for water resistance and looks.
Once we got all the material together we have to do nothing but just assemble the raft near a lake. I wouldn't advise you to use this type of raft in rivers as the structure might not be suitable in strong currents/ waves. How to build your own Tube Kayak If
you want better speed while kayaking here is one possible modification
to the above design. In this design we do not need the small pieces of
bamboo anymore. Just the long bamboos will do the job. As more friends
got interested in my raft I extended the raft and made it in to a kayak
for 4 people.
Just inflate the tubes to normal pressure and press the tube in such a way that the round shape changes to an oval shape with no gape in the centre. Use nylon tapes to keep the tube in that shape. You may also use the bamboos in between the nylon tapes to hold all the tubes together making it a long kayak. 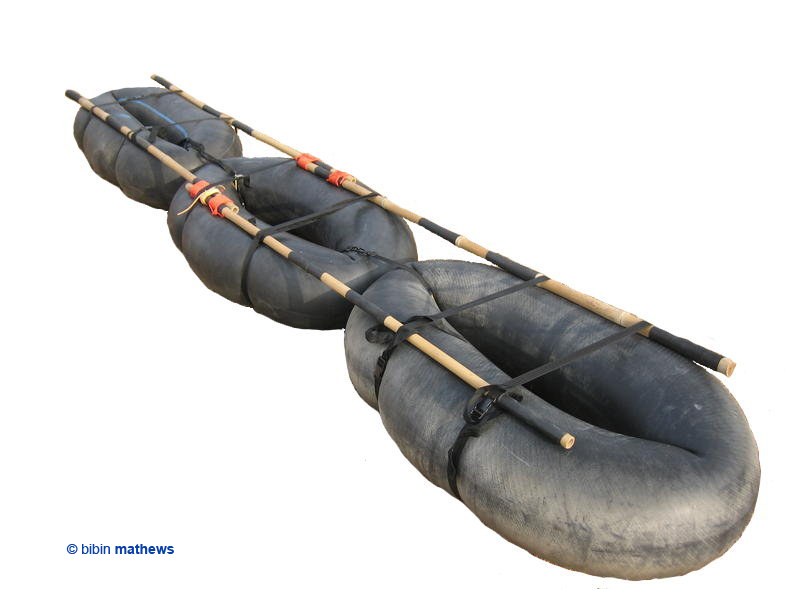 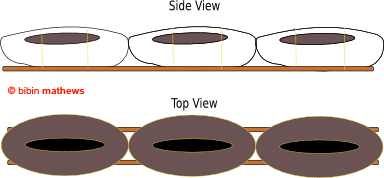 Items required to build a (4-person) Kayak:
1. Bamboos all of (1.5 inches diameter):
Length-6.5 feet= 4 pieces
2. Used truck tubes=3 3. Nylon tape (the same used in back packs) and buckles. Tape width of 1 inch and length 4.5 feet each= 6 pieces 4. Foot pump for inflating tubes (including a small tool to screw/unscrew the air valves of the tube) 5. Homemade paddles= 4 Fixing a sail to your Tube Raft/Kayak
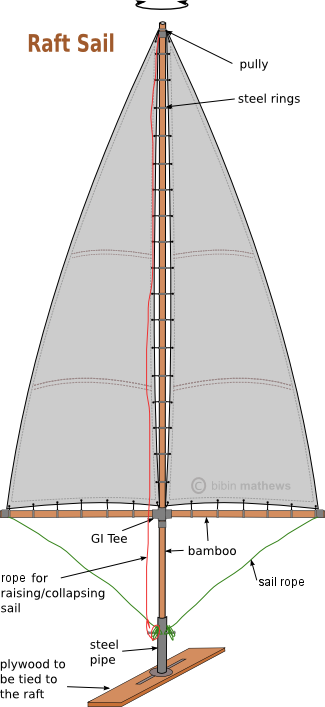
The
above sail design can be modified to your requirement:
 Our trial run of the tube raft Click Here Design of the raft with the sail and rudder done in CAD. 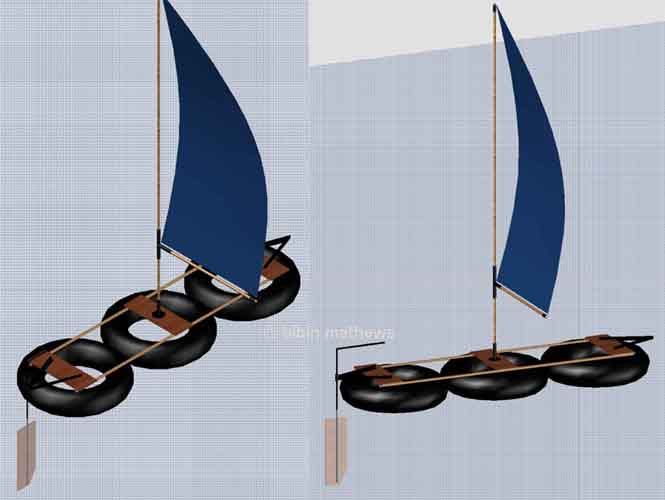 You can even work on a foresail and a rudder to have greater thrust and control respectively. Remember to always wear a helmet, lifejacket or a Personal Flotation Device (PFD) even if you are the best swimmer in town. Be extremely careful with the sail when not secured, as it can dangerously swing around in heavy winds. Have a great rafting/sailing adventure. Moderator- blog.marshal.net (this article is subjected to following disclaimer) |
||||
|